
Learn how to create a bootable USB drive using Windows 10 without any technical knowledge. Learning how to make a flash drive bootable via Windows 10 is one of the easiest hacks one can pull off.
There are various reasons for creating a bootable USB disk drive, and it comes with great advantages to do so.
With a bootable USB drive, you don’t have to carry around a lot of CDs with the software on them. You can install Windows 10 on a PC via the USB stick, after configuration.
You can carry your USB stick around easily. Irrespective of the machine you are working on, you can always boot into your OS through a USB. This is an easier way to access your programs and environment.
If you are a computer troubleshooter, it is better to carry bootable rescue tools on your USB. With a USB stick, you have faster Windows OS installation and booting, as the stick reads and writes faster than a CD.
Follow the steps below to create a bootable USB drive using the Windows 10 operating system.
Create A Bootable USB Drive Using Windows 10
- Insert a USB flash drive into one of the USB ports on a computer with the Windows 10 operating system installed. This procedure is the same for a computer running Windows 8 as well.
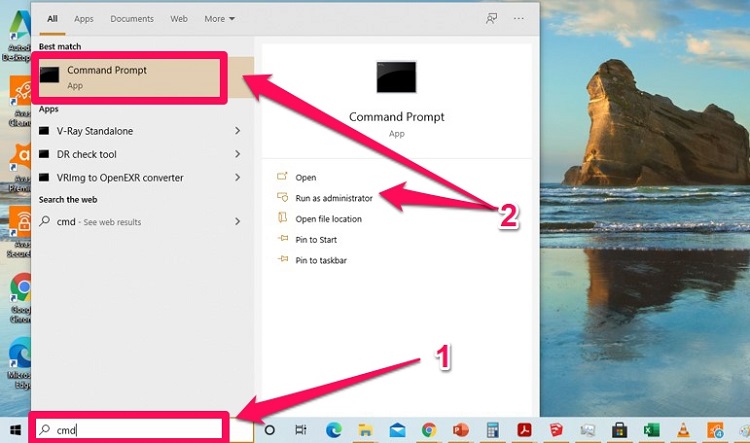
- Press the windows home button and type “CMD” to open a Command Prompt window. Run it as an administrator.
- Type “diskpart” and press the enter key.
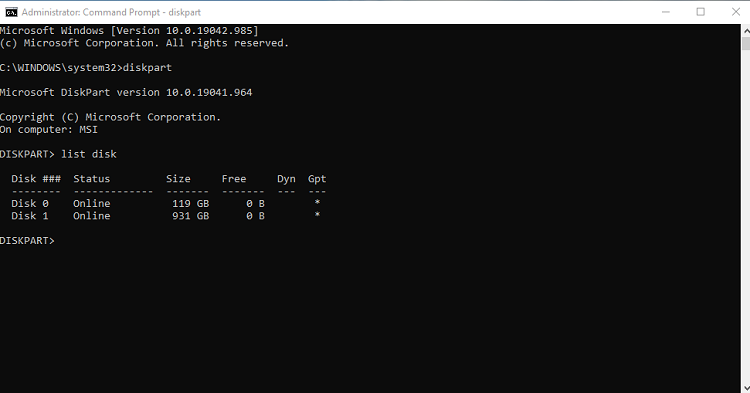
- Type “list disk”, and then click ENTER. The list disk command displays all the disks on the computer. Note the drive number or drive letter of the USB flash drive.
- At the command prompt, type “select disk <X>”, where X is the drive number or drive letter of the USB flash drive you want to make bootable, and then click ENTER.
- Type “clean”, and press ENTER. This command deletes all data from the USB flash drive.
- Create a new primary partition on the USB flash drive, by typing “create partition primary”, and then click ENTER.
- Select the partition that you just created, by typing “select partition 1″, and then click ENTER.
- To format the partition, type “format fs=ntfs quick”, and then click ENTER.
Note:
If your server platform supports Unified Extensible Firmware Interface (UEFI), you should format the USB flash drive as FAT32 rather than as NTFS. To format the partition as FAT32, type “format fs=fat32 quick”, and then click ENTER.
- Type “active”, and then click ENTER.
- Type “exit”, and then click ENTER.
Now your USB drive runs like bootable media. With this, you can use the USB drive to run windows installations, as well as other software. All you have to do is to copy the installation files into the root folder of the USB drive.
You can download your installation files from trusted websites and run the programs using the newly created USB bootable media.
If you want to restore your USB drive to its default settings and usage, simply format the USB stick.

")

")
")

